As an Amazon Associate I earn from qualifying purchases.

Welcome to our detailed guide on how to replace the drum unit in your Brother printer. As a printer owner, understanding how to replace critical components like the drum unit is essential to maintaining your machine’s print quality and longevity. In this guide, we’ll take you through the process step by step, providing insights and expert advice to make the task more manageable than you might think. Whether you’re a seasoned printer owner or a new user, our guide will help you confidently replace the drum unit, ensuring your printer continues to produce top-notch prints.
Why Replace the Drum Unit?
Before delving into the replacement process, let’s understand why replacing the drum unit is necessary. Over time, the drum unit accumulates toner residue and can develop scratches or other imperfections. This can lead to streaks, smudges, and poor print quality. By replacing the drum unit, you can restore the high-quality output that your Brother printer is known for.
There are several reasons why you might need to replace the drum unit in your laser printer:
- The drum unit is reaching its end of life. Drum units typically have a lifespan of around 10,000 to 20,000 pages. After this point, the drum may show signs of wear and tear, such as blurry or faded prints.
- The drum unit is damaged. The drum unit can be damaged by physical impact, such as dropping the printer or by exposure to moisture. If the drum is damaged, it cannot create clear prints.
- The printer is prompting you to replace the drum unit. Many laser printers have a built-in drum unit counter that tracks the number of pages that have been printed. When the counter reaches a certain level, the printer will prompt you to replace the drum unit.
If you are experiencing any of the above problems, you likely need to replace the drum unit in your laser printer. Here are some signs that the drum unit needs to be replaced:
- Blurry or faded prints
- Black spots or streaks on prints
- Blank prints
- Error messages from the printer
If you see any of these signs, replacing the drum unit as soon as possible is a good idea. A faulty drum unit can damage your printer and lead to further problems.
Here are some tips for extending the life of your drum unit:
- Avoid dropping or bumping your printer.
- Keep your printer in a clean, dry environment.
- Use genuine toner cartridges.
- Clean the printer regularly.
By following these tips, you can help extend the life of your drum unit and keep your laser printer running smoothly.
Tools and Materials You’ll Need
Here are the tools and materials you will need to replace the drum unit in your laser printer:
- New drum unit. Make sure to purchase a drum unit compatible with your printer model.
- Phillips-head screwdriver You will need this to remove the screws that hold the old drum unit in place.
- Lint-free cloth. This is used to clean the printer and the new drum unit.
- Gloves. This is optional, but wearing gloves to protect your hands from the toner is a good idea.
- Safety glasses. This is also optional, but wearing safety glasses to protect your eyes from toner dust is a good idea.
You can replace the drum unit once you have gathered your tools and materials. Here are the steps involved:
- Please turn off the printer and unplug it from the power outlet.
- Open the printer door and locate the drum unit.
- The screws retaining the old drum unit should be removed using a Phillips-head screwdriver.
- Carefully remove the old drum unit from the printer.
- Wipe the printer and the new drum unit with a lint-free cloth.
- Install the new drum unit in the printer.
- Secure the new drum unit in place with the screws.
- Close the printer door.
- Plug the printer back into the power outlet and turn it on.
The printer will now go through a self-diagnostic process. Once the self-diagnostic process is complete, the printer should be ready to use.
Here are some additional tips for replacing the drum unit in your laser printer:
- Be careful not to touch the surface of the drum unit. The drum is very delicate and can be easily scratched.
- If the drum unit is dirty, clean it with a lint-free cloth dampened with a mild cleaner.
- Do not overtighten the screws that secure the drum unit in place. Overtightening the screws can damage the drum unit.
- If you are uncomfortable replacing the drum unit, you can take your printer to a qualified technician.
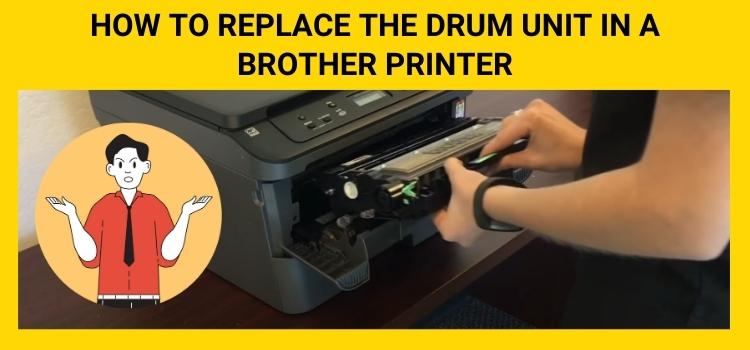
How to Replace the Drum Unit of a Brother Printer
Replacing the drum unit in your Brother printer might sound daunting, but it’s a manageable task with the proper guidance. Here’s a step-by-step breakdown to help you through the process:
Gather Your supplies.
Before you begin, ensure you have all the necessary supplies. For reference, you’ll need the new drum unit, a lint-free cloth, and the printer’s user manual.
Turn Off and Unplug the printer.
Ensure your printer is turned off and unplugged from the power source. This prevents any electrical mishaps and gives you a safe working environment.
Open the printer.
Open the printer’s front cover. Depending on the Brother printer model, this might involve pulling down a front panel or lifting a top surface.
Remove the Old Drum unit.
Gently grasp the old drum unit’s handles and carefully pull it towards you. Set it aside in a safe place to dispose of it properly later.
Clean the printer’s interior.
The drum unit, which is contained within the printer, should be cleaned using a lint-free cloth. Removing any residual toner or debris helps maintain optimal print quality.
Unpack and Prepare the New Drum unit.
Take the new drum unit out of its packaging. Before installation, gently rock it from side to side to evenly distribute the toner.
Install the New Drum unit.
Slide the new drum unit into the printer along the same tracks from which you removed the old one. Ensure it’s securely in place.
Close the printer.
Close the printer’s front cover securely until it clicks into place.
Plug In and Turn On the printer.
Plug the printer back into the power source and turn it on. Follow any on-screen prompts to calibrate the new drum unit with the printer.
FAQs
While it’s technically feasible, replacing the drum unit to maintain print quality and avoid potential issues is recommended.
Drum unit replacement frequency varies based on usage. However, replacing it after every three to four-toner cartridge changes is recommended as a general guideline.
It’s best to replace the drum unit when the printer indicates it’s low. Continuing to print with a quiet drum unit can result in poor print quality.
While consistent possibilities might be more affordable, it’s advisable to use genuine Brother drum units to ensure optimal performance and quality.
Delaying drum unit replacement can lead to faded prints, streaks, and poor print quality.
Yes, drum units can often be recycled. Check with local recycling facilities or electronic waste disposal programs for proper disposal methods.
Conclusion
Congratulations! You’ve successfully learned how to replace the drum unit in your Brother printer. Following our step-by-step guide and taking care of your printer’s components, you’ll enjoy consistent, high-quality prints for a long time. Remember, regular maintenance and replacements are vital to extending the life of your printer and ensuring it operates at its best. If you have any questions or need assistance, please refer to our guide or seek help from Brother’s official support resources.
Related Post
Amazon and the Amazon logo are trademarks of Amazon.com, Inc, or its affiliates.


Leave a Reply